CANINE MIND: BEHAVIOR AND TRAINING
  • Home
  • Services
  • Resources
    • Cooperative care
    • Dog Fundamentals
    • Enrichment
  • About
  • Contact
  • Forms

Cooperative Care

The foundations
Vet Exams
Nail trims
Brushing teeth

What is it?

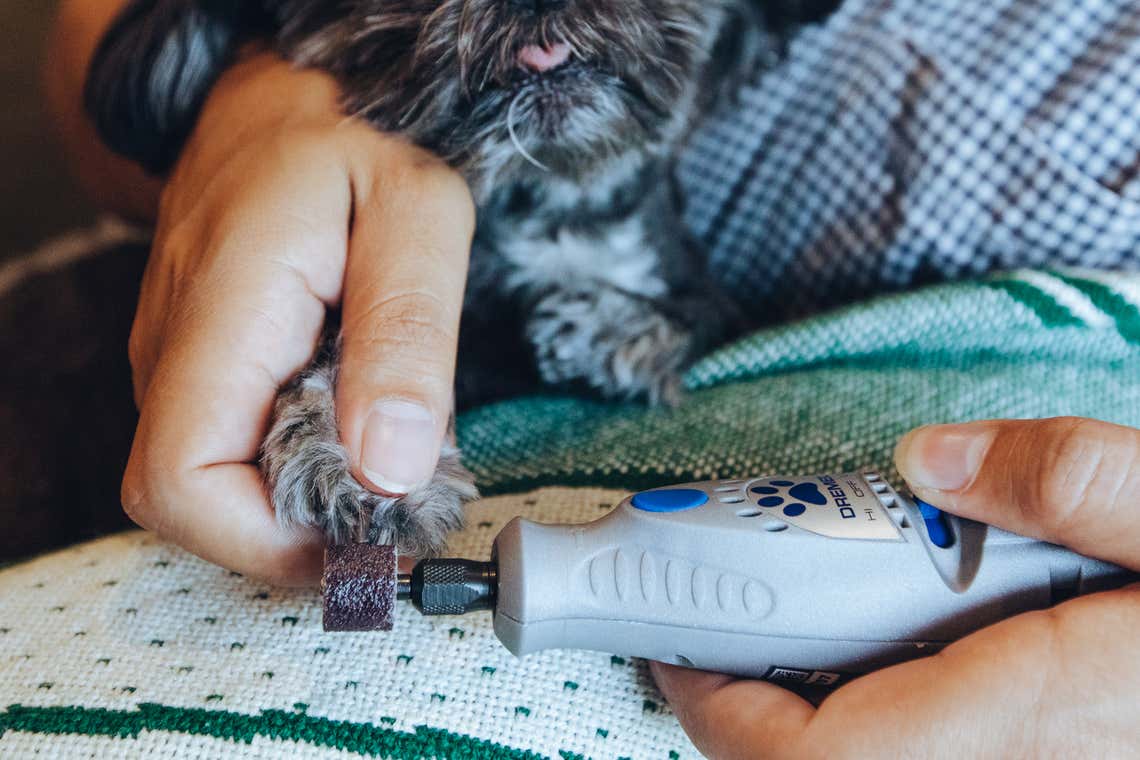
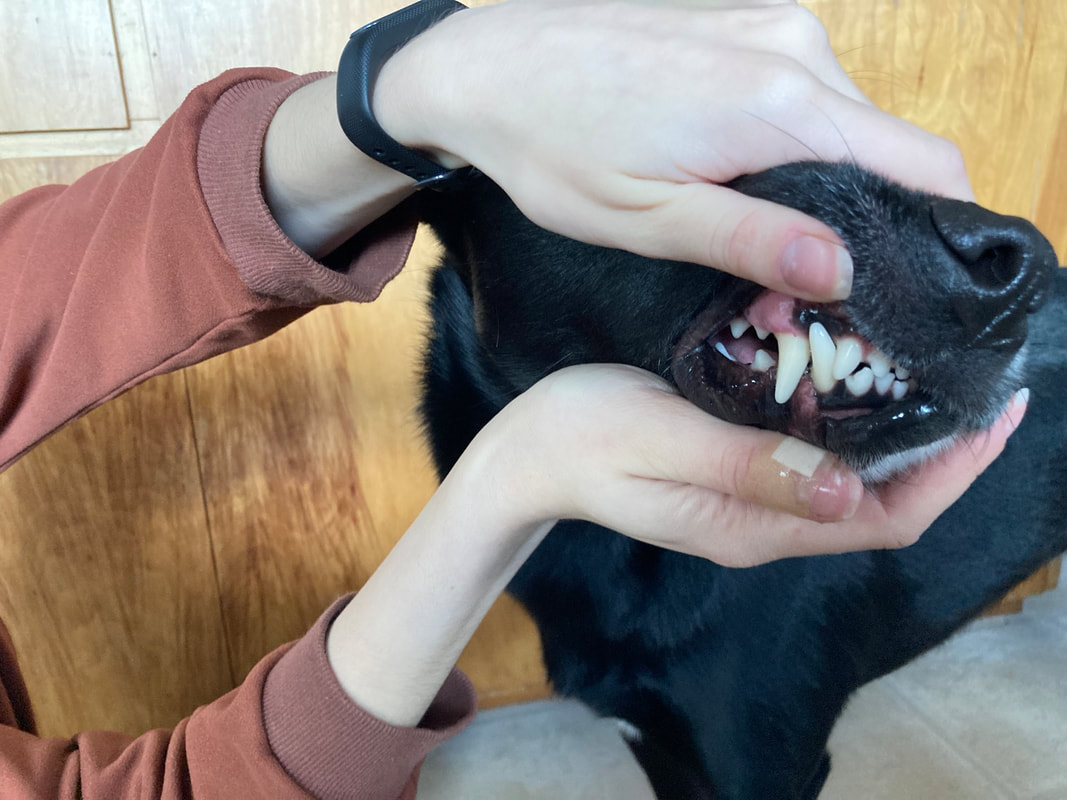
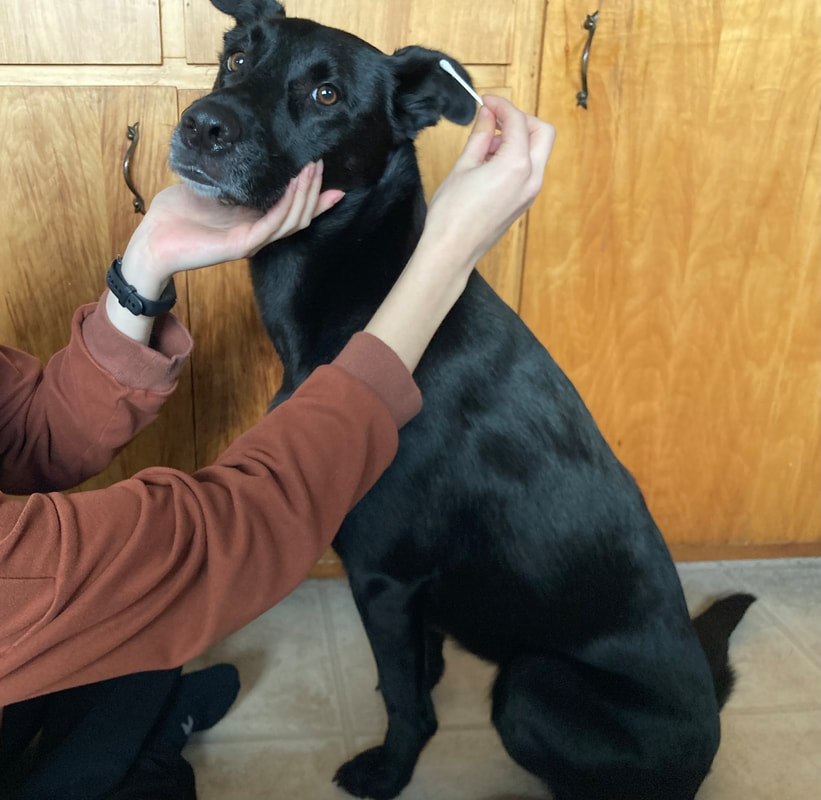
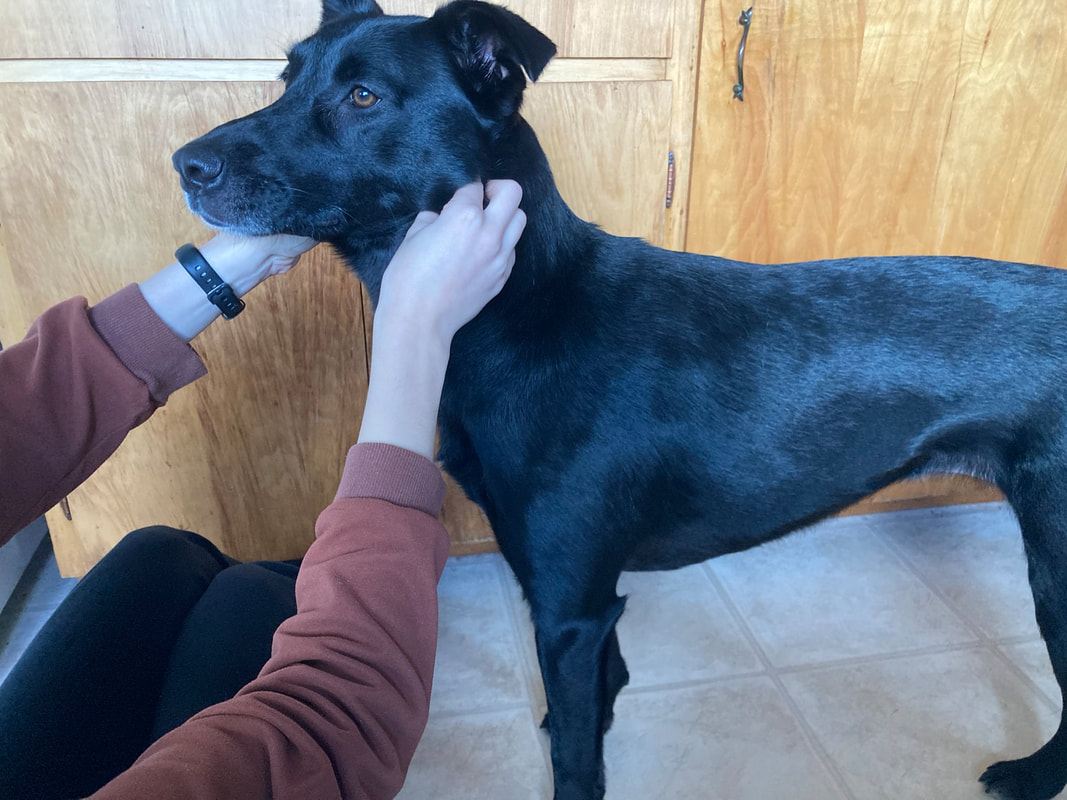
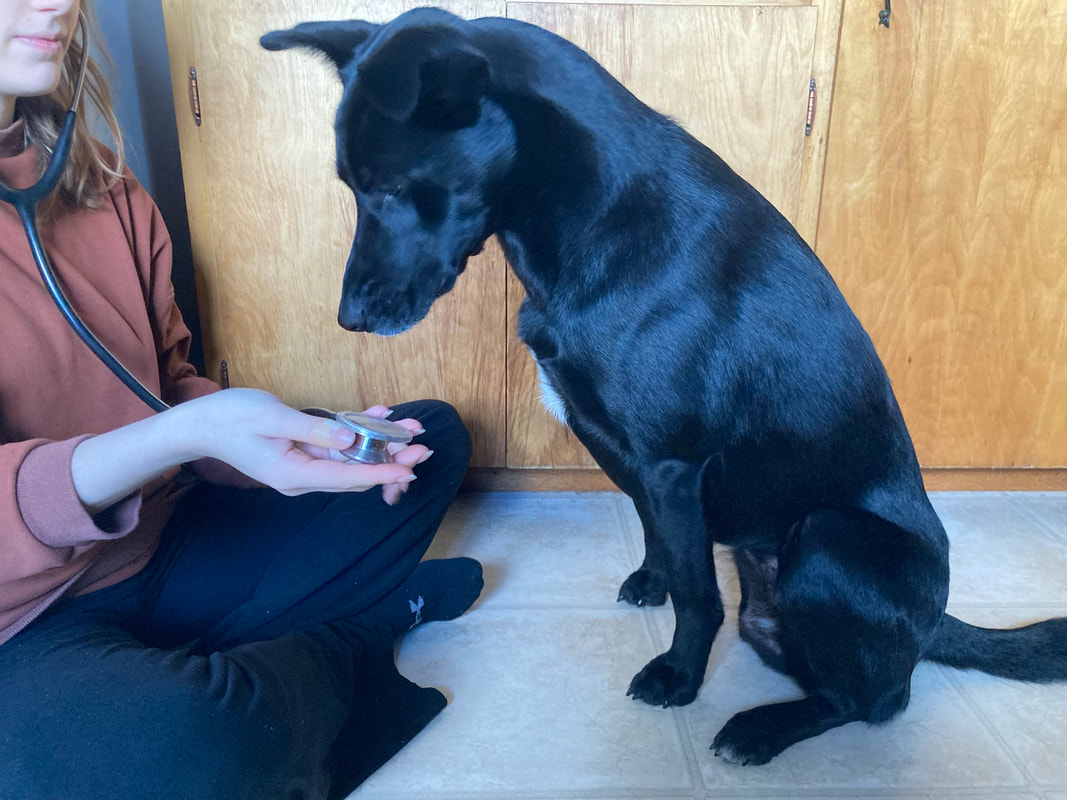
Cooperative care is training that allows our pets to be active, willing participants in their medical care! Handling, nail trims, and vet trips can all be less stressful on both dogs and the veterinary staff.​
We teach our dogs what to expect, how to participate and how to ask for a break. In return, they get to show off their awesome new tricks, form friendships with vet staff and make medical care much less overwhelming. ​


Picture
Picture

Why do it?

Going to the vet should no longer require lots of restraint, fear, anxiety, stress or bites. It can become a fun outing to practice training and have their treatments done smoothly. Giving your dog a clear way to communicate how they're feeling will allow you to advocate for them and build their trust in you. Your dog and the veterinary staff will love you for it!
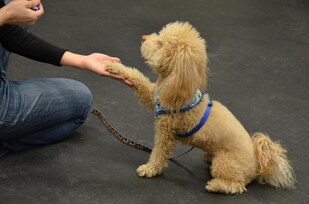
Can my dog really learn that?

Absolutely!! Most zoo animals are trained to participate in their medical care- everything from dentals to ultrasounds to blood draws. Almost no animal is untrainable, regardless of type, breed, size, age or anything else. Go ahead, try it out!
Picture
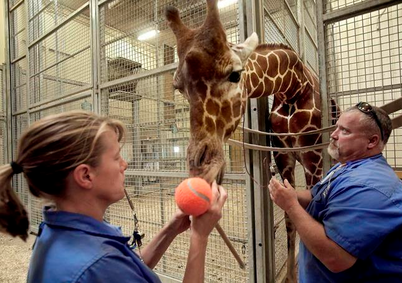
"In this June 29, 2017, photo, Columbus Zoo and Aquarium keepers Sheri Smith, left, distracts "Lance" a giraffe, while Scott Shelley, right, draws blood at the zoo, in Columbus, Ohio. ” (Tom Dodge/The Columbus Dispatch via AP, File)"
 

The foundational skills

This set of skills forms the foundation behavior for every cooperative care trick you'll learn moving forward. If you spend a good amount of time learning these basics, you'll fly through the more advanced behaviors!
The first thing you'll teach is a sustained hold. This behavior functions as your pause/resume button for handling. So long as your canine companion is choosing to hold their position, they are permitting handling and treatment. When they break their position, they're asking for a break. The more times you practice this together, the longer they will accept handling. The position you choose will vary for different types of treatment or handling, but once your dog understands how to start/stop using their body language, they will transfer that knowledge to new positions. Some of my favorite positions to teach:
Lying on their side, head resting on the ground
Lying on their belly with head up
Resting their head in your hand
Resting their head in your lap or on a pillow 
​
The next thing to work on is your use of rewards and breaks. As we desensitize our dogs to weird handling techniques, they will get uncomfortable and ask for you to take a break. It is essential that you listen. Short sessions are often the best for working gradually through beginning stages- say 5-10 minutes each. Focus on calmly rewarding your dog with treats/pets/praise when they're holding their learned position and permitting you to handle them. This creates a reason for them to participate! Think about taking young kids to the doctor for vaccines- they often get a lollipop or a sticker for being brave and letting the doctor administer the vaccine- it's the same concept for our dogs. When your dog lifts their head or breaks from their position, stop handling them and wait until they want to resume. There will be times they don't want to participate- that's okay! Try again at another time. 
My final tip for foundations: give each behavior a verbal cue that helps your dog know what to expect and when it's going to happen. When I want to look at my dogs teeth, I tell her "teeth" as her cue to start a sustained hold and know that I'm going to lift her lip. This can relieve stress due to ambiguity!

One final note: people often ask me, "what if I NEED to handle them?". There are situations that arise where our dogs need to get their vaccines or be handled because they have an injury, and that's okay! We can communicate to them using a verbal or physical signal (like clipping their leash on) that handling has to happen. But, when our dogs have a foundation of cooperative care, they're usually much more willing to let us do these necessary things. 


Annual Veterinary Exam

The hands on portion of a yearly vet exam usually includes:
  • Looking at your dog's eyes
  • Looking at their teeth
  • Looking in their mouth
  • Looking at/smelling/swabbing their ears (if anything abnormal is detected)
  • Palpating their lymph nodes
  • Palpating their abdomen 
  • Using a stethoscope to listen to their heart and lungs ​
Picture

Eyes

At your dog's annual physical, the doctor is going to briefly look in your dog's eyes- they won't need to use any special tools unless there is a concern. The sustained position used in this check is often their head held in your hand. This gives the doctor a good basic behavior to use to take a quick look. 
  1. Start by teaching your dog to place their head in your open hand. Extend the duration of time until you feel like a doctor could examine their eyes thoroughly.
  2. Once they're comfortable with the head rest, start desensitizing them to your other hand moving towards their face. Treat and praise them for maintaining the head rest.
  3. Next, start placing your free hand on the top of their head while they maintain their head rest. Continue treating and praising for the sustained head rest.
  4. Once they're comfortable with your hand on top of their head, use your fingers to lift the upper eyelid and look in their eyes. Start with very brief looks, then take a quick break and ask them to repeat the head rest. 
  5. Slowly extend the amount of time and manipulating that you can do with their eyelids/head until they're completely comfortable and happy to participate. Remember your rewards and breaks!

Teeth

The process for teaching your dog to let you look at their teeth is very similar to the eyes! Change your cue and practice the following steps.
  1. Start by teaching your dog to place their head in your open hand. Extend the duration of time until you feel like a doctor could examine their teeth thoroughly.
  2. Once they're comfortable with the head rest, start desensitizing them to your other head moving towards and resting on their muzzle. Treat and praise them for maintaining the head rest.
  3. Next, start lifting their lip to take a peak at their teeth. Keep it short and sweet at the beginning. Continue treating and praising for the sustained head rest.
  4. Once they're comfortable with your hand lifting their lip, move the location around. You'll need to see their molars, premolars, incisors and canines on both sides of their mouth. They might appreciate a break in between locations.
  5. Slowly extend the amount of time and movement you can do with their lips until they're completely comfortable and happy to participate. Remember your rewards and breaks!

Mouth

Believe it or not, you can actually teach your dog to open their mouth on cue. This behavior is taught utilizing more of a free shaping technique instead of desensitization. They get to perform the action instead of having the action performed on them. 
This is a more complicated behavior to teach, so there is a brief instructional video on the left. 

Ears

  1. Start by teaching your dog to place their head in your open hand. Extend the duration of time until you feel like a doctor could examine their eyes thoroughly.
  2. Once they're comfortable with the head rest, start desensitizing them to your other head moving towards their face. Treat and praise them for maintaining the head rest.
  3. Next, start placing your free hand on the top of their head while they maintain their head rest. Continue treating and praising for the sustained head rest.
  4. Once they're comfortable with your hand on top of their head, fingers to lift their ear up and open to peak inside. Start with very brief looks, then take a quick break and ask them to repeat the head rest. 
  5. Slowly extend the amount of time and manipulating that you can do with their ears/head until they're completely comfortable and happy to participate.
  6. Finally, you can desensitize to the use of a Q-tip or cotton swab on the upper portion of their inner ear. Remember your rewards and breaks!

Lymph Nodes and Palpation

Lymph nodes and palpation are a very important part of the veterinary exam- it allows your doctor to check for any signs of inflammation/infection and pain! Having our dogs hold still and relax during this can be very helpful. 
  1. I don't ask my dog for a sustained hold for this section because there is lots of movement involved. Instead, I watch her body language closely and make this a very rewarding process so that she's excited to do it!
  2. The doctor is will lightly pinch and feel the lymph nodes located in their neck and behind the knee to check for any swelling. Some dogs prefer to sit while having their neck palpated, while others prefer to stand- both are fine. Practice getting them used to this type of handling and link it to treats!
  3. Next, you're going to practice palpating their abdomen by applying light pressure and feeling their entire body with your hands. It can be helpful if your dog knows to stand still for this. Remember to reward, start slowly and take breaks!

Stethoscope Exam

Once your dog has practiced and is comfortable with lymph node checks and palpation, adjusting them to a stethoscope is the next step. 
  1. If you have a stethoscope, let your dog sniff it and interact with it. Reward them for this process. You're creating a positive association with the stethoscope, instead of a scary one. If you don't have a stethoscope, you can utilize a variety of similar looking objects to practice the pattern.
  2. Start moving the stethoscope towards the dog and rewarding them for holding still and allowing you to do this. Go slowly and reward as you do.
  3. Once your dog permits you to place the stethoscope on their chest, reward them! Start with small periods of time with the stethoscope on their body wall without moving it. Build up to being able to slide the stethoscope on their body and for longer periods of time. Reward and take breaks!
 

Nail Trims

Nail trims can be one of the most stressful procedures for dogs and owners alike! Our anxiety about cutting too deep and trying to restrain our dogs at the same time can be really overwhelming for them. There are a few ways to teach our dogs to participate in nail trims to reduce stress:

  • Scratch boards give our dogs the autonomy to do the entire procedure themselves- think of it like a giant nail file. 
  • We can teach them to relax while you clip their nails using trimmers. 
  • We can teach them to relax while you trim their nails using a Dremel. ​ ​

Scratch Boards

Since we're not doing any handling of our dogs here, this portion is most similar to free shaping a trick. You're going to reward your dog for engaging with the scratchboard to form a positive association, then increase the criteria and reward them for scratching their nails on the board. 
  1. Place the scratchboard against your legs- you want approximately a 45-degree angle between your dog's nails and the board. 
  2. When you dog looks at or investigates the board, reward them! 
  3. Once they're providing consistent attention to the board, start to up your criteria and reward them for the slightest foot movement towards the board. 
  4. As they learn that you're rewarding them for using their feet to engage with the board, continue to reward and up the criteria. Make sure they clearly understand the behavior they're being rewarded for and can provide it at least 80% of the time before upping the criteria. 
  5. Once they've started scratching the board continuously, you can give it a name and put it on a cue! Now your dog can file their own nails with a little help stabilizing the board from you. 

Nail trimmers

The foundations section on teaching sustained positions for breaks in procedures is going to be key for the next two sections. Personally, I prefer my dogs to lie down on their sides, with their head on the ground, while doing nail trims. For my small-medium sized dog, I use human toenail clippers instead of dog nail clippers because she prefers them. They still do the job, they just require more clips per toe.
  1. Start by teaching your dog a sustained position of your choice. 
  2. Gently begin handling their feet/legs with your hands. Reward them for staying calm and keeping their position while you handle them. Discontinue handling when they move their body or head out of position. Follow this reward/break pattern for all future steps.
  3. Using your closed clippers, start by gently touching their feet for 1-2 seconds. Gradually work up to increasing the time.
  4. Repeat step 3 with your clippers open. Then move to placing the clippers around their nails- don't apply pressure yet!
  5. Once they're comfortable with the clippers around their nails, start to cut tiny pieces of nail off. Reward heavily here and take lots of breaks!

Nail Dremel

​Some dogs are much more skittish around a Dremel than clippers because of the noise and vibration. If your dog is having a hard time, I suggest trying a different tool.
  1. Start by teaching your dog a sustained position of your choice.​
  2. Gently begin handling their feet/legs with your hands. Reward them for staying calm and keeping their position while you handle them. Discontinue handling when they move their body or head out of position. Follow this reward/break pattern for all future steps.
  3. Let your dog sniff and investigate the Dremel while turned off. Reward them for engaging with it. 
  4. Ask your dog to start holding their position and turn the Dremel on a few feet away from their body. They will likely sit up or break their position. You can ask them to start over and reward them when they do. Continue to reward calm, sustained holds of their position with the Dremel on. As they become more confident, decrease the distance and follow the same reward pattern. 
  5. Once your dog is comfortable with the Dremel a few inches from their feet, turn it off and start placing it against their toes for a couple seconds. Reward when they hold the position and discontinue when they break it. 
  6. After they're completely comfortable with step 5, turn the Dremel on and gently place against one toenail briefly. This process is likely to feel weird and your dog will break their position. That's okay! They're learning that this loud, smelly tool that vibrates their toes isn't harmful. Be patient and go slowly. 
  7. Slowly expand the amount of time that you can file their toenails with the Dremel! 
 

Teeth Brushing

Did you know that brushing your dog's teeth can help protect them from plaque build-up and tartar? It can also help reduce the number of cleanings you need to do in their lifetime! They even make yummy flavored toothpastes for your canine friend. Some vets recommend brushing 2x/day for optimal results, but conclude that 1x/day is sufficient. I brush my dog's teeth in the evening- right after cleaning my own. 
This process will look just like all the other cooperative care we've talked about- pick a position, desensitize to the object and process, gradually build duration and remember to reward and take breaks!
  1. Pick whether you'd like your dog sitting, lying or standing for their sustained position. It also helps to have your dog trained to permit dental checks- brushing teeth is just one step further. 
  2. If your dog is not trained for dental checks yet, refer to the section on teeth. 
  3. Present your dog with a toothbrush and some yummy toothpaste. Let them lick it off. You're associating the toothbrush with a tasty snack! 
  4. Practice running your finger across your dog's teeth like you would with a toothbrush. Reward and take breaks! 
  5. Once they're comfortable with your finger, you can switch to the toothbrush and practice. Start slowly! Gradually build up to different areas of the mouth, how vigorously you brush and how long your brush for. Remember your rewards and breaks! 

Get in touch!

Located in Philomath, Oregon
Email: caninemindllc@gmail.com
Call or text: 503-583-5776
Proudly powered by Weebly
Photos used under Creative Commons from andreaarden, shixart1985
  • Home
  • Services
  • Resources
    • Cooperative care
    • Dog Fundamentals
    • Enrichment
  • About
  • Contact
  • Forms